6. Selections
Selecting blocks in a model is important for the function of many filters, but in order to successfully work with them, it is important to know two three things about them in the context of AthosGEO View and ParaView. With this it makes sense to dedicate an entire chapter of this manual only to selections.
6.1. Fundamentals about Selections in AthosGEO View
The selection system of AthosGEO View is inherited from ParaView, but AthosGEO View has to use it in a slightly uncommon way for some of it’s filters. Some basics that need to be known:
Within the entire filter pipeline, always only one selection can exist. This is important to know because many filters do rely on an active selection, and it is of course possible to have more than one filter in the pipeline that needs a selection as input.
The filter pipeline can be saved into a state file (*.pvsm file), but this does not include the active selection. However, the selection definition is retained as a property, so it will be recovered if a state file is loaded.
The effect of the latter is that a pipeline with several filters that require selections will work properly and can even be saved to and loaded from state files, as illustrated in Fig. 6.1 to Fig. 6.3. A problem arises if the user wants to go back in the pipeline and modify a selection.
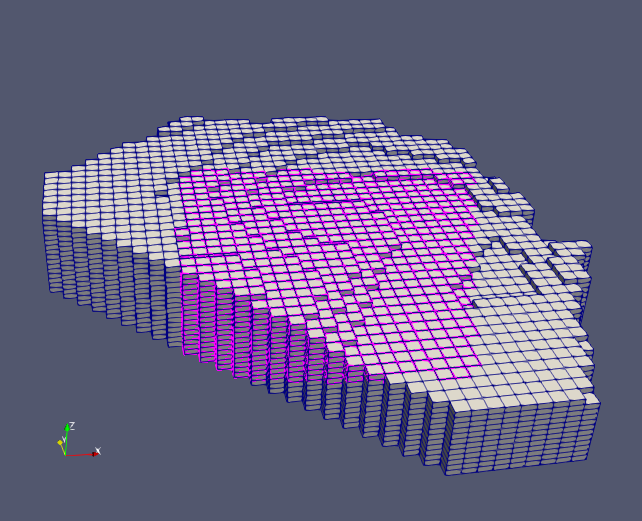
Fig. 6.1 A demo model with some selected blocks.
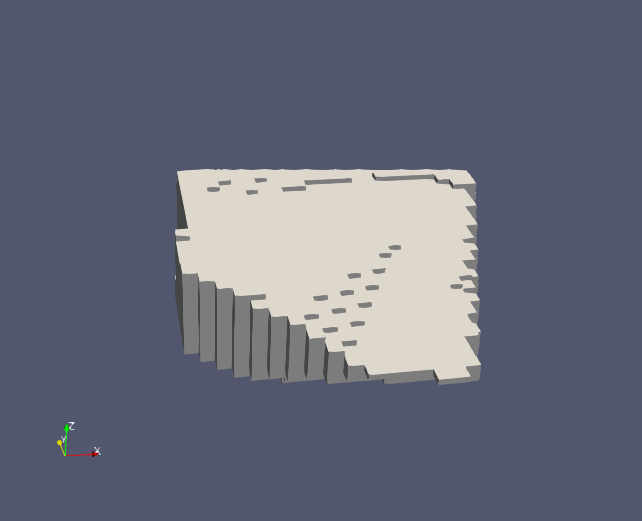
Fig. 6.2 An Extract Selection filter was appended to the filter pipeline and the extracted blocks were extracted.
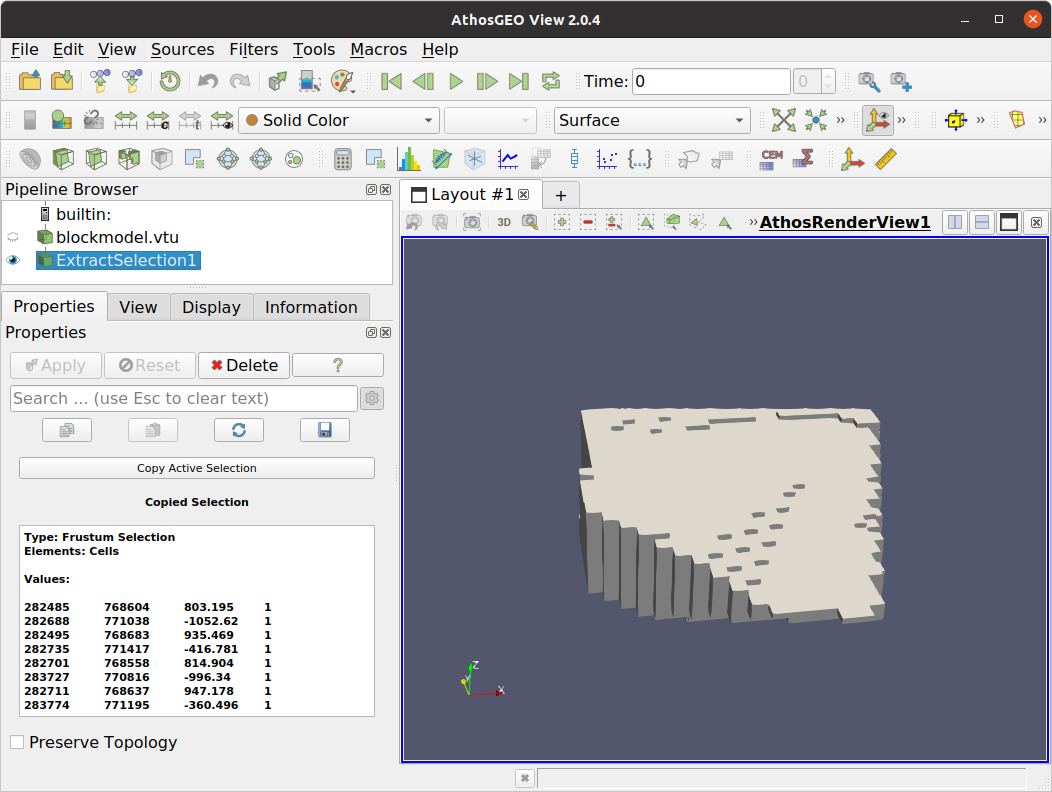
Fig. 6.3 The pipeline with demo model and Extract Selection filter was saved to a state file and loaded back into AthosGEO View: The render view shows the extracted blocks like after initially applying the filter.
The “trick” that AthosGEO View and ParaView applies to achieve the result as in Fig. 6.3 can be seen in the Properties panel: parameters of the selection were saved and recovered as properties of the filter. However, going back in the pipeline, the selection does not reappear: it does not exist any more.
What the user can do:
Go back to the block model,
Make a completely new selection,
In the properties panel of the filter, press the Copy Active Selection button and
Press also the Apply button.
As a result, the displayed selection parameters will appear in the Properties panel, and a new extraction is shown in the view.
Did you know?
The example shows the typical order of actions with selections that require a selection:
Do some selection on the pipeline item that precedes the pipeline item that represents the filter.
Add the filter that will recognize the existing selection and show it’s parameters in the Properties panel.
If the user wants to change the selection now, he needs to switch between input item and filter item in the pipeline browser accordingly.
6.2. Selection Tools
Most of the selection tool buttons are found immediately above the Render View (3D view) panels.
Did you know?
In the following sections, only selection tools for cells will be explained!
The Athos Render View in AthosGEO View is a special version of the Render View that exists already in ParaView. The difference is the availability of selection tool buttons. Functionality is not added, but removed: The original render view has the same selection tools not only for cells, but also for points.
Why has this functionality been removed for AthosGEO View? It is because we have a very strong focus on block models, and in this special case the availability of point selection buttons is only confusing!
This is not a problem, because for all cases where the user needs point selection tools, the original Render View is still available.
6.2.1. Select Cells On  
Select a rectangle and all model blocks (cells) that are visibly partially or fully inside this rectangle will be selected. An example of this functionality is shown in Fig. 6.4.
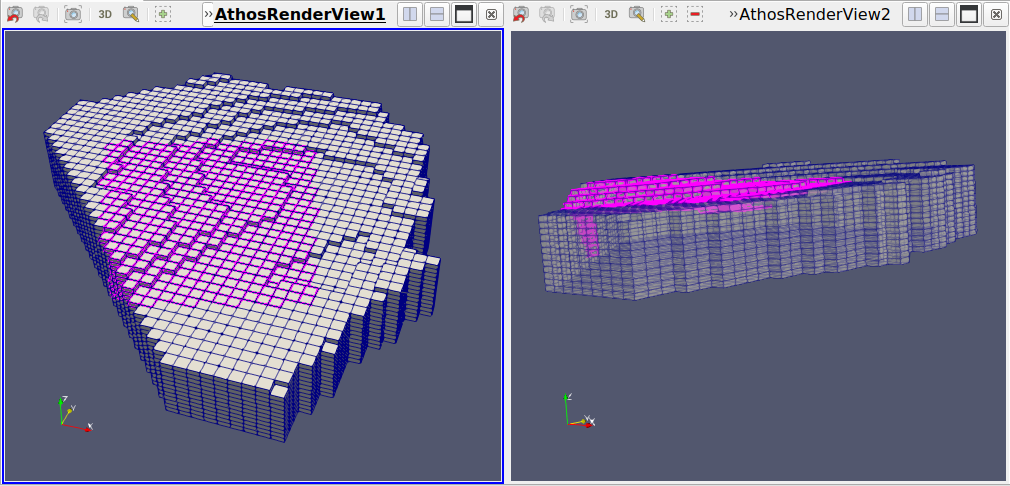
Fig. 6.4 With the Select Cells On function, only visible surface
blocks are selected within a rectangular view area.
6.2.2. Select Cells Through  
Same as above, but in this case also all those model blocks (cells) will be selected that are visibly and invisibly inside a rectangular prism, as seen in Fig. 6.5.
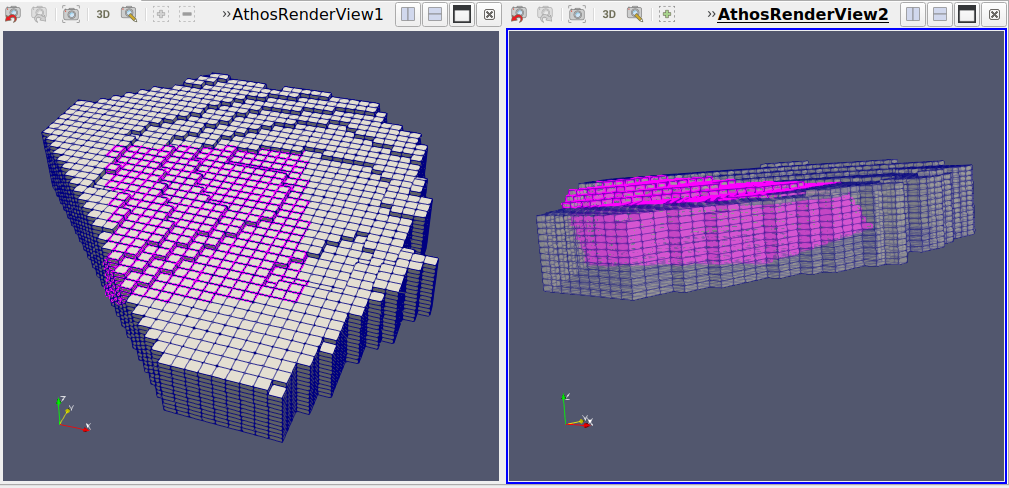
Fig. 6.5 The difference between Select Cells Through
and Select Cells On is the fact that the first will
select only those model blocks that are invisibly “behind” the visible
selected rectangle.
Hint
The Select Cells Through tool can be pretty dangerous because it will select blocks that you do not even see because they are behind the visible surface blocks! There are two things that you can do to ensure best possible control of what is going on:
In the View panel, check the Camera Parallel Projection option to gain more control about which model blocks will actually be affected.
The Set View Direction to… buttons in the toolbar can be used to to align the view exactly in parallel to one of the main coordinate axes.
6.2.3. Select Cells with Polygon  
This tool allows to select blocks inside a more complex area than a simple rectangle. It selects only blocks at the visible surface, as shown in Fig. 6.6.
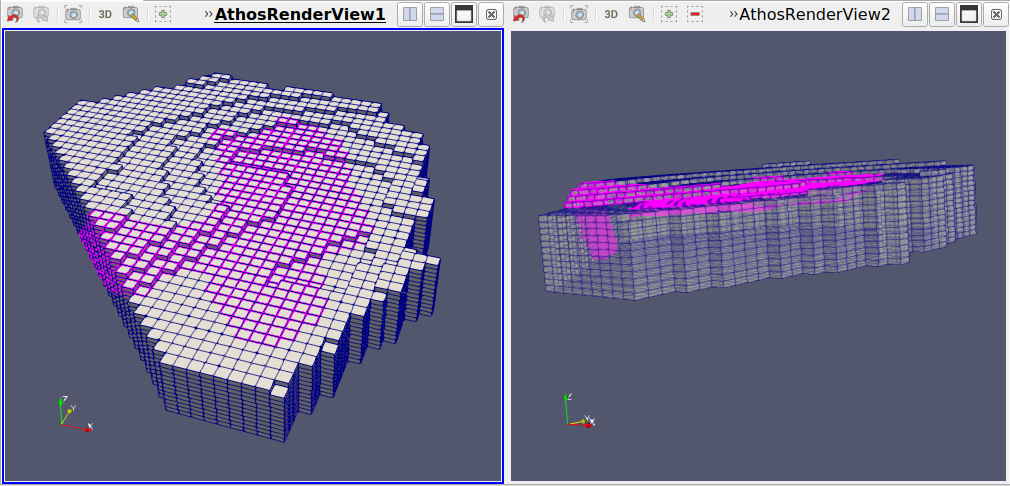
Fig. 6.6 In order to select surface blocks with the Select Cells with Polygon tool, press the left mouse button, move along the desired outline, and once the button is released, the polygon will be closed automatically.
6.2.4. Select Cells Interactive  
The Select Cells Interactive tool is a toggle that is turned on or off
by pressing the button. If it is on, clicking on a model
block will select it.
Hint
Make sure to always turn this tool off after use!
There is no automatism that would turn the tool off automatically at any time. If it is not done manually, the behaviour of the view will be “strange”, and in the worst case unintended things will happen.
6.2.5. Find Data  
The Find Data docking panel is certainly the most powerful selection function:
It selects model blocks (cells) by criteria. The icon cannot be
found among the other selection tool buttons but in the main toolbar of AthosGEO View.
Alternatively, the Find Data docking panel can also be opened through the View
menu, and it will appear as shown in Fig. 6.7.
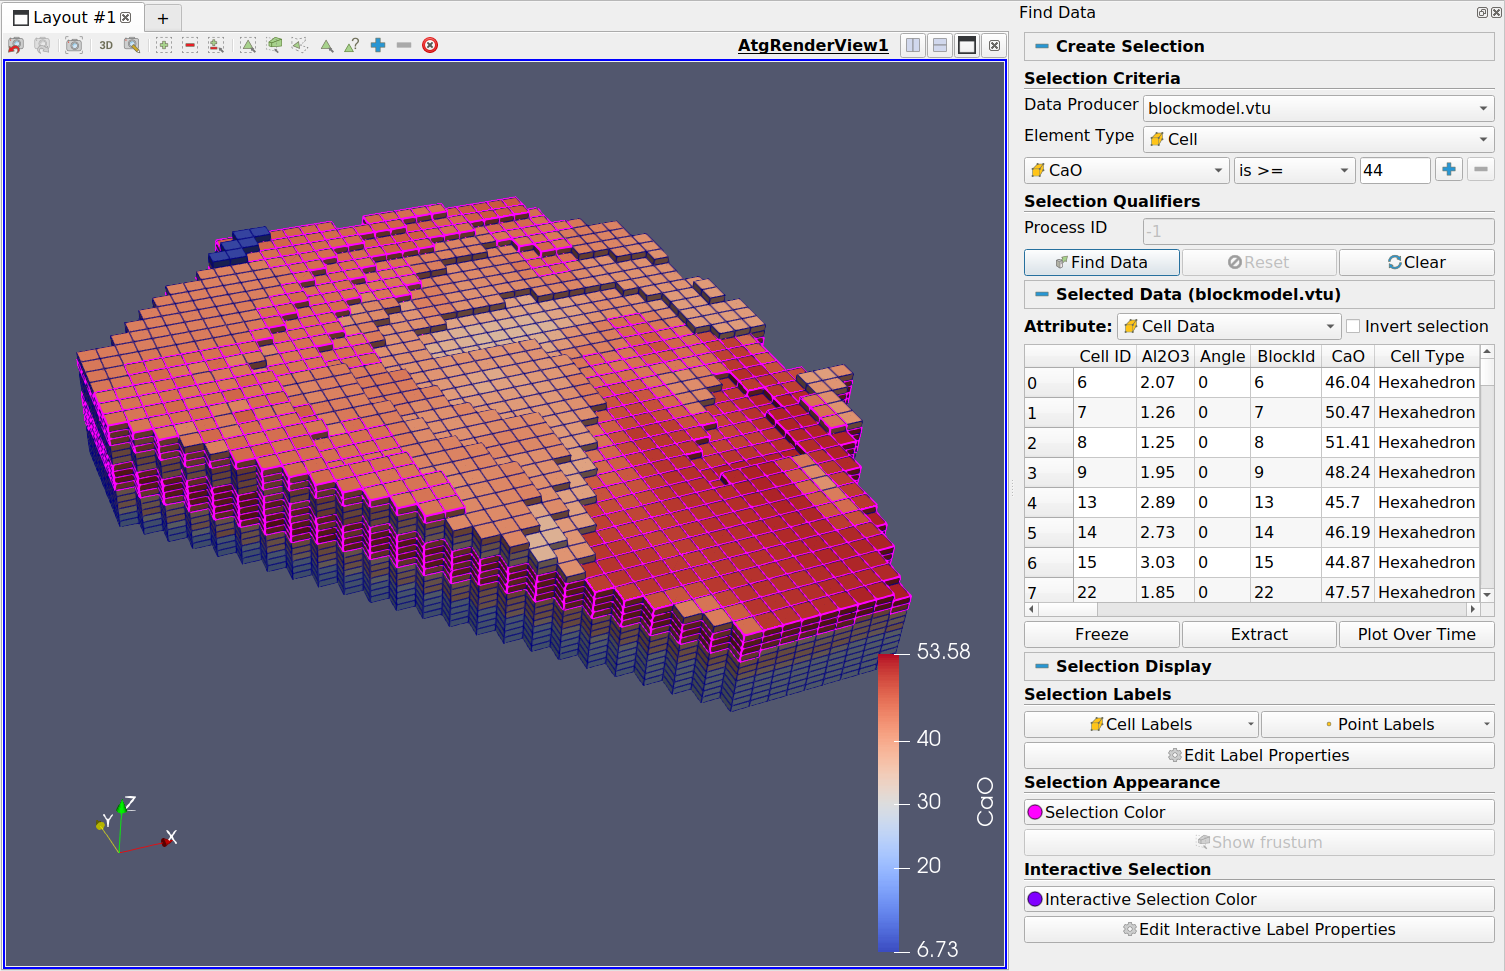
Fig. 6.7 The Find Data docking panel allows to specify criteria for the selection of model blocks
Note
The Find Data tool is very powerful regarding selections by attributes, but it handles only numeric attributes, not strings, as shown in Fig. 6.8.
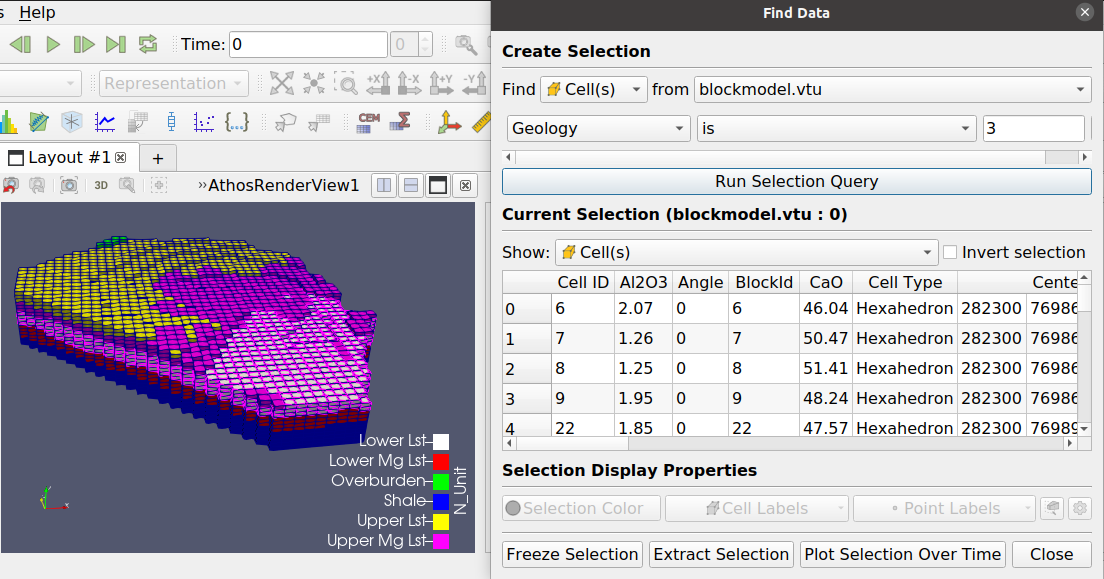
Fig. 6.8 In this example, Find Data is supposed to select blocks in the
Lower Limestone geological unit. In the N_Unit attribute, these appear
as Lower Lst, and in the 3D display they can be shown as such in the
legend. However, Find Data can only handle numeric attributes,
so another attribute had to be introduced, Geology, where the same
units are represented by code numbers - 3 in this case.
6.3. Add, Subtract or Toggle Selection
By default, selection tools will always replace an existing selection. This behaviour can be changed by activating one of the following selection mode buttons at the top of a Render View panel:
Add Selection
If this selection mode is turned on, any new selection will be added to the already existing selection.
Subtract Selection
With this selection mode, all selection tools will actually unselect blocks.
Toggle Selection
In this mode, selection tools will work as a toggle: selected blocks will be unselected and unselected blocks will be selected.


6.4. Grow and Shrink Selections
Two more handy functions, with tool buttons directly at the top of the Render View panels:
Grow Selection
Pressing this button will try to add one more model block to the existing selection in all possible directions.
Shrink Selection
This function will do the inverse of the previous function and try to remove model blocks from the border of the current selection.
Note however, that it will work only with model blocks that were previously added by the Grow Selection function!


6.5. Selections for Attribute Manipulation
The AthosGEO View software extends ParaView with some simple selective attribute manipulation functions. A problem is the fact that the ParaView selection system as described in Section 6.1 is not really made for such kind of functionality. As a consequence, these specific AthosGEO View plugins for selective attribute manipulation are dealing with selections in a somewhat different way than other plugins are doing.
Specifically, these explanations are about the following plugins:
For the user, the most important difference is the order of activation:
Common
Select blocks
Activate the filter
Selective Attribute Manipulation
Activate the filter
Select blocks
The important point is, that, other than described in Section 6.1, selections should be recovered as far as possible if the user goes back in the Pipeline Browser in order to change a selection. With the common setup, this works only as long as there is not more than one selection in the entire pipeline and if it is not re-loaded from a state file.
The series of screenshots from Fig. 6.9 to Fig. 6.12 will explain the point with an example, where first 3 values were defined in the block model using 3 instances of the Write Value filter, then the selection for the first of these filters was changed.
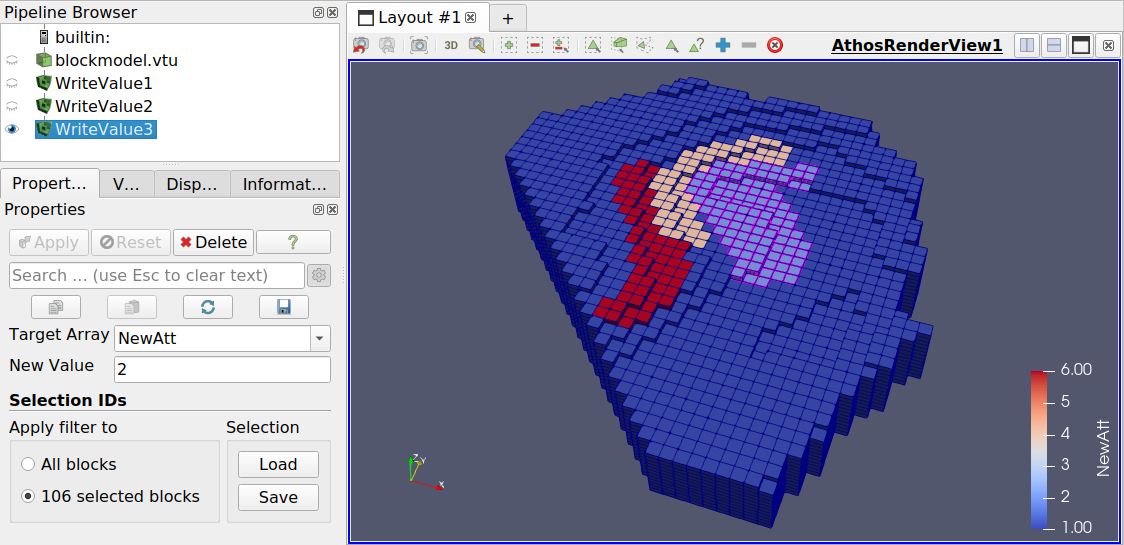
Fig. 6.9 A new attribute NewAtt was created in this block model and 3 different values were assigned with 3 instances of the Write Value filter.
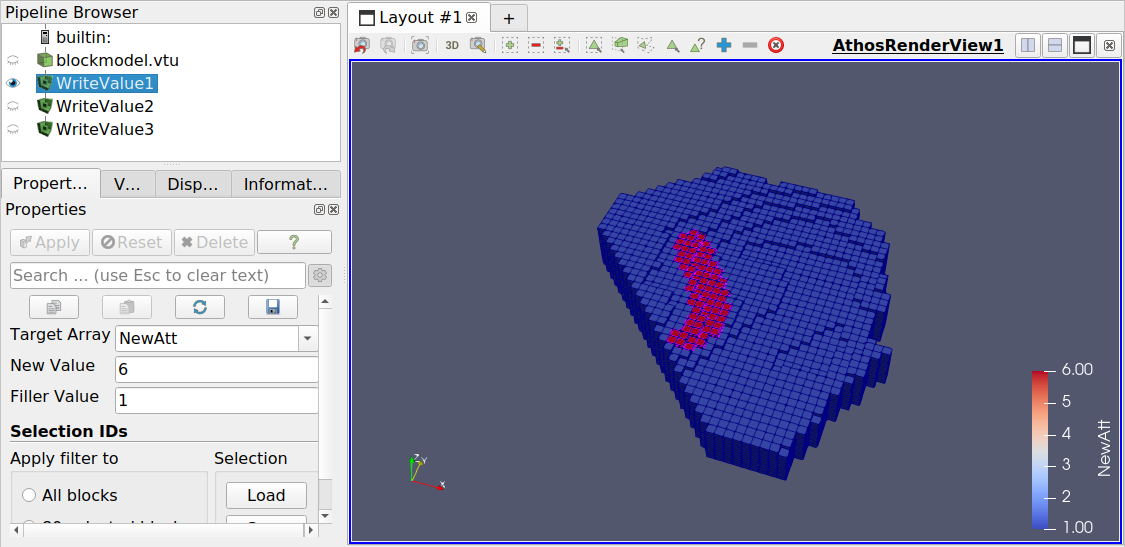
Fig. 6.10 First turn off the display of WriteValue3, in order to hide also the selection that is related to it. Then turn on WriteValue1 by clicking on the eye symbol. With this, the selection that was related to this filter will be restored.
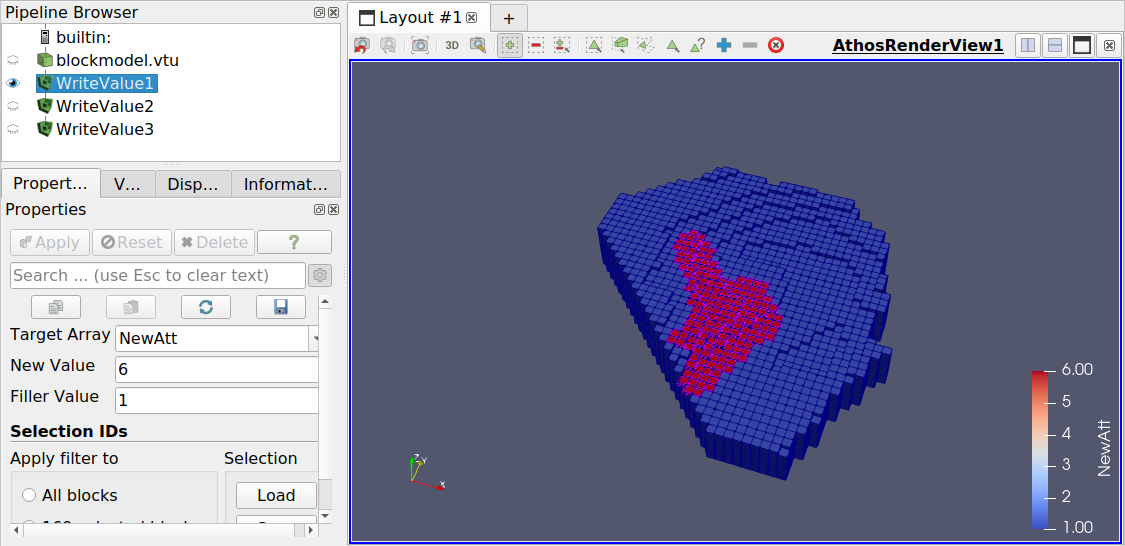
Fig. 6.11 After activating the Add Selection option in the toolbar above the view, an additional region was selected with the Select Cells with Polygon filter. Pressing Apply will extend the area with NewAtt value of 6.
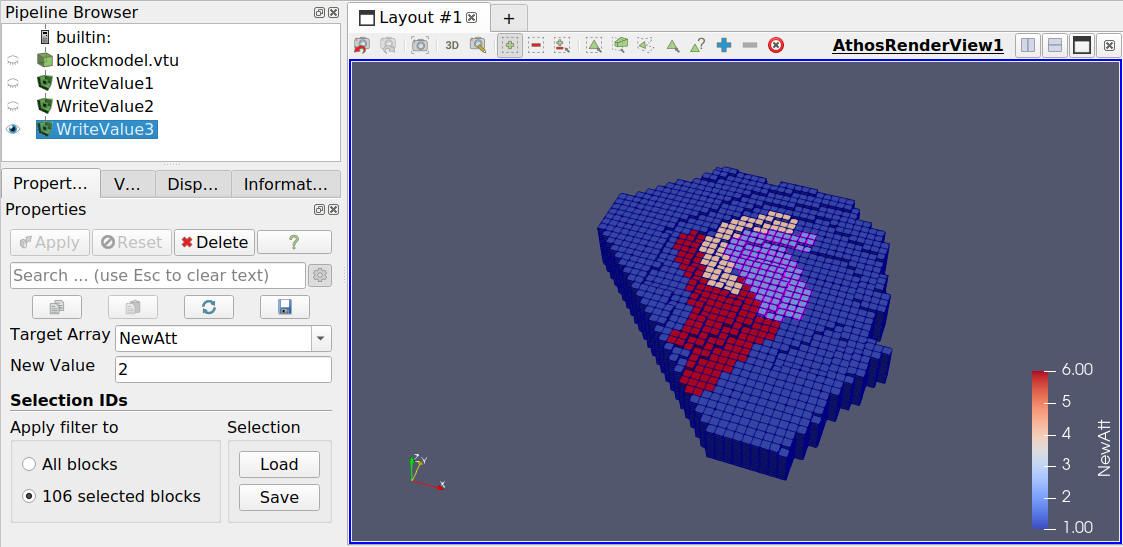
Fig. 6.12 Again WriteValue1 should be unchecked first before showing WriteValue3 again.
Note
The order of hiding and showing items in the pipeline can be important because of the rule that always only one single selection can really exist in the entire pipeline. If two pipeline items with selections are shown at the same time, the outcome may not always be predictable.
Hint
Please make use of the Save and Load buttons related to the Selection IDs in the Properties panel: If a complex selection should better not get lost accidentally, it should be saved to a file, so it can be easily restored without much effort.
Did you know?
Creating a new attribute and assigning 3 different values (plus a background value) as shown in Fig. 6.9 can also be achieved with only one instance of the Write Multi Values filter.